
Paula Deen's Peppermint Pie has been a hit with my family for the past few years, and is now requested at the work potluck. It only takes a few ingredients, and is a good way to use up some candy canes! Her instructions are super simple, so here are some photos and notes to help-
See photos & notes
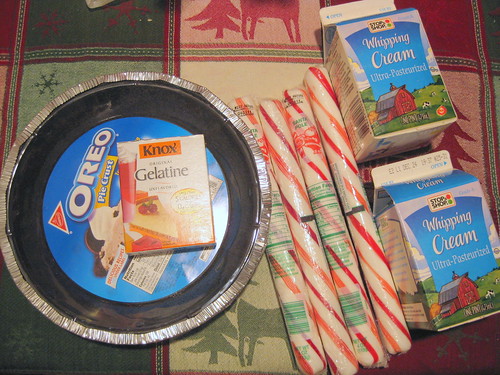
Step 1- Gather ingredients
Oreo makes the best chocolate crust in my opinion. I used these massive peppermint sticks to cut down on plastic waste.
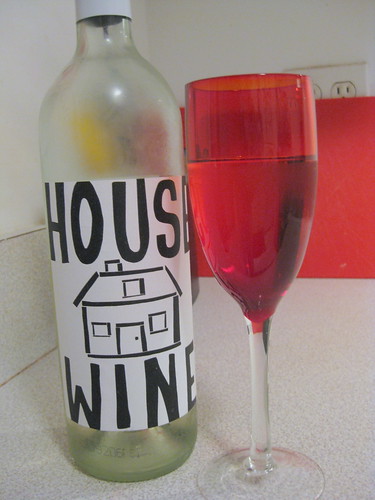
Step 1a- Pour self a glass of wine
House Wine, love the label. The wine itself is just ok. The festive red glass makes the pie taste better.
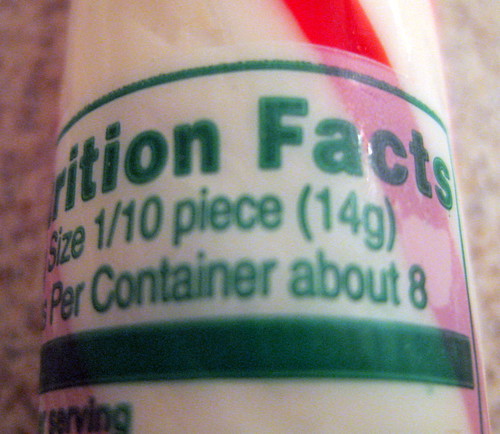
Step 2- do you see what I see?
...uh-huh.
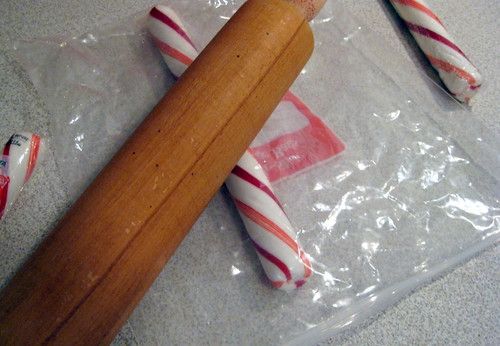
Step 3- smush!
Rolling pins, hammers, and other blunt objects work well.
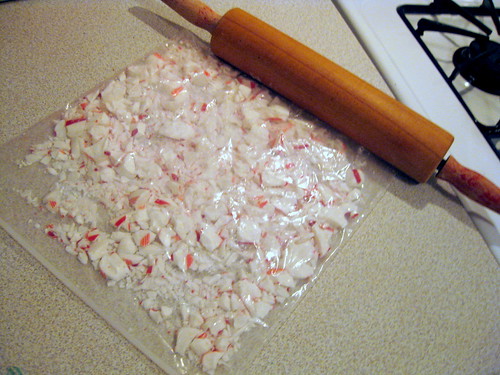
Step 3- done!
Make sure they're nice & small, otherwise it'll take forever to melt.
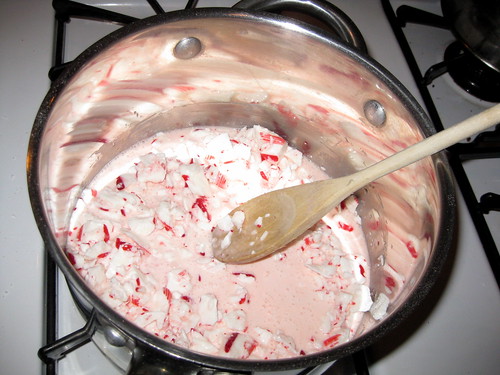
Step 4- melt!
This is what it looks like when you first add the cream. It starts to take on that great pink color.
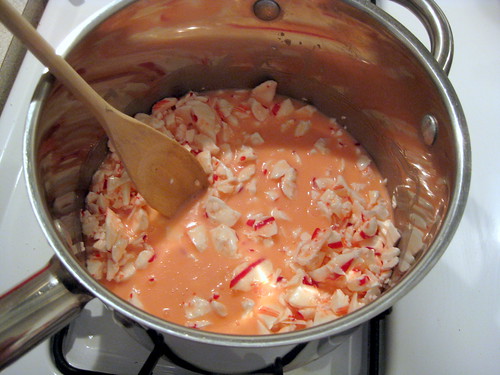
Step 4 continued
Keep the heat very low, and stir often.
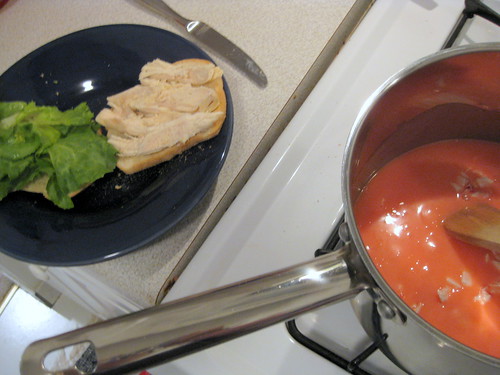
You can take the opportunity to make a sandwich and refill your wine glass.
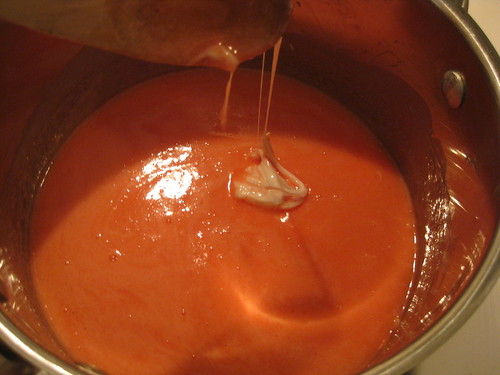
This is a good consistency, it won't all melt completely.
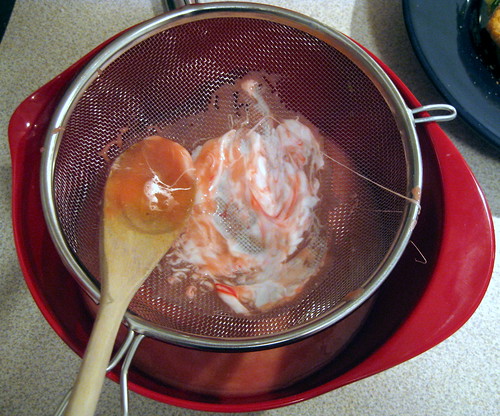
Step 5- secret trick
It always seems that a few solid pieces persist, so I strain out the mostly melted candy. Let it cool at room temperature, don't chill (the gelatin will make it solidify). Stir every 10 minutes or so while it's cooling, otherwise a skin forms on top.

Step 6- whip & fold!
For best results chill your bowl and whisk in the freezer before whipping. I have a stand mixer, so it makes super fast work of this step. (The mixer is also pink...hmm...)
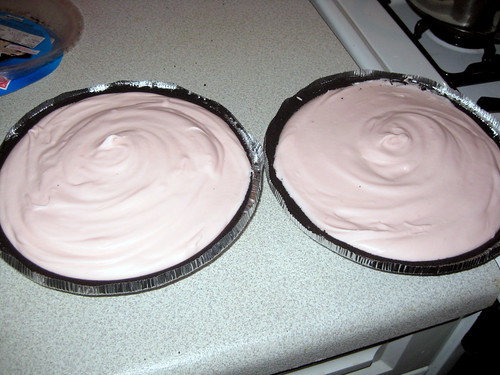
Step 7- Fill crusts!
Don't worry if you have too much filling, or a few crumbs end up on top.
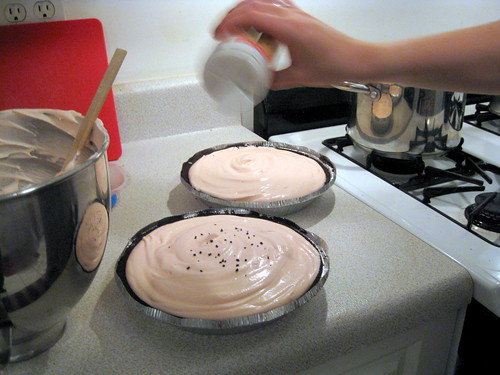
Sprinkles will fix it! I didn't fill these too high because they had to travel, so...
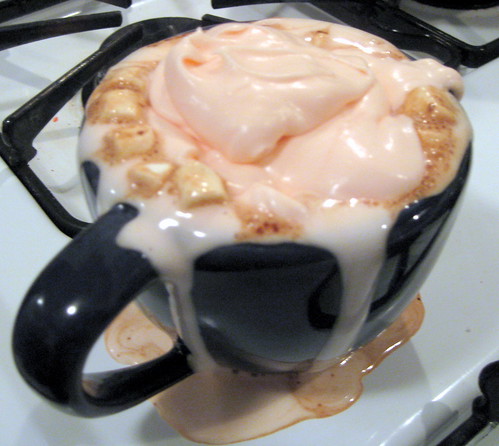
The extra filling goes well with hot cocoa or coffee, just be careful not to make a huge mess like I did...
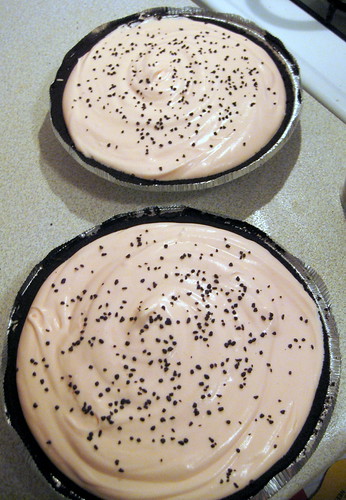
Your tasty pink peppermint pies are done! Voila!
See photos & notes
Step 1- Gather ingredients
Oreo makes the best chocolate crust in my opinion. I used these massive peppermint sticks to cut down on plastic waste.
Step 1a- Pour self a glass of wine
House Wine, love the label. The wine itself is just ok. The festive red glass makes the pie taste better.
Step 2- do you see what I see?
...uh-huh.
Step 3- smush!
Rolling pins, hammers, and other blunt objects work well.
Step 3- done!
Make sure they're nice & small, otherwise it'll take forever to melt.
Step 4- melt!
This is what it looks like when you first add the cream. It starts to take on that great pink color.
Step 4 continued
Keep the heat very low, and stir often.
You can take the opportunity to make a sandwich and refill your wine glass.
This is a good consistency, it won't all melt completely.
Step 5- secret trick
It always seems that a few solid pieces persist, so I strain out the mostly melted candy. Let it cool at room temperature, don't chill (the gelatin will make it solidify). Stir every 10 minutes or so while it's cooling, otherwise a skin forms on top.
Step 6- whip & fold!
For best results chill your bowl and whisk in the freezer before whipping. I have a stand mixer, so it makes super fast work of this step. (The mixer is also pink...hmm...)
Step 7- Fill crusts!
Don't worry if you have too much filling, or a few crumbs end up on top.
Sprinkles will fix it! I didn't fill these too high because they had to travel, so...
The extra filling goes well with hot cocoa or coffee, just be careful not to make a huge mess like I did...
Your tasty pink peppermint pies are done! Voila!
Enjoy, and Merry Christmas to you and yours!
Read more!


